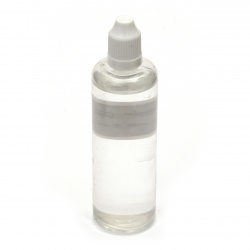
Epoxy Resin
Epoxy resin and decoration are materials with which you can make different castings. The epoxy resin is transparent, usually two-component and becomes solid after drying. With it you can make all kinds of jewelry, even when casting you can put different small decorative elements or dried flowers that will convey the uniqueness of your creation. In contrast to the resin, the decoration is not transparent; when the casting is dried, it retains its elasticity and is easy to paint. Which makes it a great material for decorating bottles and objects.
View more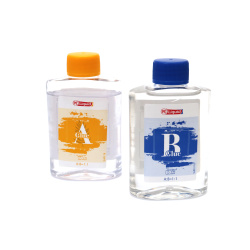
Epoxy Two-Component Glue – 118 ml – Ultra-Strong, Durable & Clear Bond Perfect for Jewelry, Wood, Metal and Creative Projects
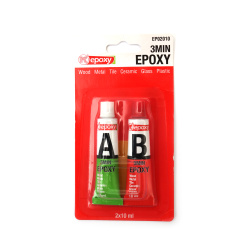
Compact Epoxy Two-Component Glue – 10 ml, Ultra-Strong, Clear & Fast-Setting Adhesive Perfect for Jewelry, Wood, Metal and Precise Repairs
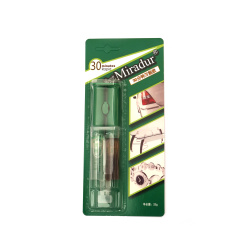
Fast-Drying Epoxy Resin, Two-Part 1:1 Ratio with Nozzles, 30-Minute Cure, 25 grams
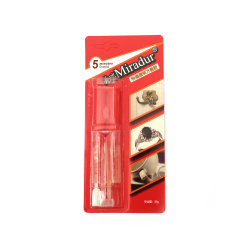
Epoxy resin quick drying -5 minutes two-part with nozzles ratio 1:1 - 25 grams
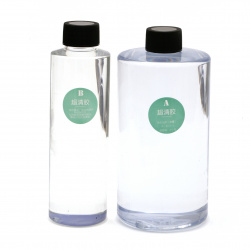
Ultra Clear Epoxy Resin for Jewelry Making, Two-Component AAA Grade, Ratio 3:1 (A-750g / B-250g) - 1000g

UV Resin, Extra Quality - 50 grams

Extra-Quality UV Epoxy Resin for Jewelry Making - 50 g (1.76 oz) Ultra Clear, High-Transparency, UV-Light Cure, High-Gloss for Molds, Pendants & DIY Resin Crafts

Premium Quality UV Resin - 20 g

PREMIUM QUALITY Two-Component Epoxy Resin Kit for Jewelry Making, Ratio A/B - 1:1, 560 grams
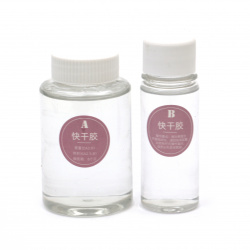
Quick-Drying Epoxy Resin for Jewelry Making, Two-Component, Ratio 3:1 (A-150g / B-50g) - 200g
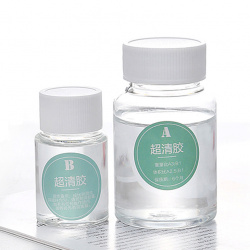
Ultra Clear Epoxy Resin for Jewelry Making, Two-Component AAA-Class, Ratio 3:1 (A-75g / B-25g) - 100 grams
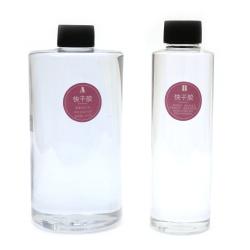
Clear Epoxy Resin Kit, Fast-Drying – 2-Part (3:1 Mix), 1 kg Total (A: 750 g + B: 250 g) – Crystal-Clear Casting, Coating & Adhesive for Jewelry Making, Crafts, DIY & Resin Art

Epoxy resin two-component 2000 ml hardener 1000 ml

UV Transparent Ultra-Clear Resin with Applicator 100 ml
Epoxy Resin Glue
To make a wonderful gift or decoration, you can use various materials. If you are skillful enough, nobody is going to notice the gift is handmade! Use our epoxy products to mold pendants, earrings, and rings. Boxes, medallions, and refrigerator magnets will also look great.
Main Principles and Recommendations for Working with Epoxy Resin Glue
Resin is a gel-like transparent mass that covers the desired surface. The work must be done with gloves. The resin should be mixed with a hardener using a special wooden spatula, which is used later to spread the resin on the product. The mixing process should be done carefully to avoid air bubbles. They will disappear eventually, but it will take time.
The proportions must not be altered, because if you add too little hardener, the resin will be dense and sticky and ruin the appearance of the product. The resin should be applied to flat surfaces, as this material is liquid and spreads. If you need to cover round surfaces, such as earrings, they should have a protective edge or ring to prevent spreading.
Since epoxy is a transparent material, it is often filled with dried flowers, insects, and decorative elements. A decoupage magnet, covered with a transparent resin layer, would be beautiful.
The word "epoxy" is familiar to almost everyone. Epoxy resin, as a material, is common today. It appeared in the 1950s and quickly gained popularity due to its various properties.
Today, epoxy resins are used in industrial production and households. The possible applications are constantly expanding due to the development of new forms and improved characteristics.
Chemically, epoxy resin is a synthetic oligomer compound. These materials are in demand in almost every industry. Epoxy resins and decoratin are resistant to the following substances:
- Halogens
- Acids
- Bases
Working with epoxy resin requires preparing the surface before applying the compound. Only then can you achieve high adhesion. Therefore, before dissolving the epoxy resin, you must first prepare the surface. Begin by degreasing the surface, and checking for any oil or grease. Clean the surface with a solvent or cleaner.
Product Characteristics
Epoxy resins can harden through several methods:
- Chemically (with a hardener)
- By heating
- By exposure to UV light
For creating decorative items, resins that harden at normal conditions chemically are used – by adding a hardener.
This means that we have a two-component kit – resin and hardener. Both are liquid and are mixed just before use. Usually, the quantities are pre-calculated and sold in prepared kits for customer convenience. In such a case, you only need to mix component 1 with component 2.
For larger quantities, if you need to mix a small amount before the entire batch, weigh the two components in the specified amount on the label, for example: "100 parts of component 1/resin are mixed with 43 parts of component 2/hardener."
The measurement can be by weight or volume. It’s important to pay attention to this because due to the different densities of the components, 100 grams is NOT equal to 100 milliliters! If weight parts are specified, then weigh; if volume parts, measure by volume.
First, plan what you want to achieve and how you’ll do it. Then gather all the necessary materials, tools, and cleaning supplies. Prepare your surface adequately before starting anything. This means your surface should be clean, dust-free, degreased, fixed, and safe.
You will be working with chemicals, so make sure there are no heat sources nearby, and you have personal protective equipment, including:
- Disposable gloves
- Chemical safety goggles
- Work clothes
- A protective mask with respiratory filters
People are different - not everyone will have allergic reactions. It’s important to know that toxic substances are released during the hardening of epoxy resins as part of the chemical reaction.
These fumes are not visible and, in some cases, have no smell. But prolonged exposure (for years) to such "fumes" can lead to health problems. Some people are more sensitive and may experience rashes or other allergic reactions with the slightest contact with this type of synthetic resin. For them, working under a hood and limiting exposure to these substances is recommended.
Otherwise, it’s best to stop working with epoxy altogether. It’s important to know that once fully cured, epoxy resins no longer release any harmful substances into the environment and are completely safe.
If an accident occurs and part of the compound comes into contact with your skin, eyes, or other areas, read the safety recommendations.The label will provide essential information to medical professionals regarding the composition and possible reactions to the product.
Hardening of Resins
The mixture goes through several stages during the hardening process. Standard resins for thin layers have about 30 minutes of working time. This means the mixture remains liquid for 30 minutes. In about 30 minutes, the composition begins to thicken, forming a gel-like structure. This stage is called gelation. After gelation, the actual hardening occurs.
Usually, after 24 hours, the resin should have gained enough strength that pressing it with your finger does not deform it. Also, it should not feel sticky when touched. If these signs are not present, the resin has not fully hardened. Full strength is achieved after 7 days for all epoxy resins.
How to Make Epoxy Resin Jewelry?
Production Process:
- On a standard office paper, draw two identical templates for the future earrings. You can draw freehand or use any ready-made templates. Cut out the detail with scissors. The surface where the resin will be poured must be as even as possible.
Before pouring, degrease the surface with alcohol, because if you don’t remove dust beforehand, all particles of lint and dust will end up inside the product. You can use the back of a silicone mat covered with a paper sketch of the future earrings as such a surface.
- Take white mosaic glue and apply it to the edges of the paper sketch, holding the paper with your fingers to prevent it from shifting when applying the glue. Once the outline is closed, carefully remove the paper sketch from the silicone mat. Repeat the process with the second detail. The outline dries in 20 minutes, or in 5 minutes if placed on a warm radiator.
- Mix the epoxy resin with the hardener in a 2:1 ratio. The container for mixing these two components must be clean and disposable. The combined components should be mixed carefully with a wooden stick for 5 minutes.
If air bubbles appear, you can place the container with the components in a warm place for 10 minutes, but the heating should not exceed 60 degrees.
- Prepare different colored epoxies in separate containers. It’s best to use a special silicone palette with depressions. Pour a little resin into one shape, add a few drops of blue dye, and add a few drops of green dye to the second shape and stir thoroughly. Ideally, you should get soft shades of blue, symbolizing the sky, and light green, symbolizing green grass.
- Once the edges of the earrings are dry, they form the base of the jewelry. It will consist of two shades: blue - symbolizing the sky, and green - symbolizing soft grass. Pour a little blue resin into the hollow molds, and spread the resin over the top wide part of the blank to exactly half of the product using a wooden stick.
Pay special attention to the edges. The resin must fit tightly to the glue edges. From the middle of the earring blanks, apply green epoxy with a wooden stick. Distribute the resin evenly. The filling layer should be thin, as at this stage, only the base is formed.
- Prepare dried flowers. Using tweezers, place the dried flowers onto the liquid surface of the earring base. The resulting piece is left in a warm place until it fully hardens.
- After drying, the products are removed from the silicone mat, and the dried mosaic glue is removed with tweezers.
- The resin and hardener mixture is diluted again, and the blanks are poured on the front side with a thick layer of resin, forming a transparent convex lens. The pieces are then set aside again until the epoxy layer fully hardens for 24 hours.
- The front side of the earrings is now completely finished. Lastly, fill the backside, where you also need to form a convex lens from epoxy resin and leave it to dry completely.
- The earring blanks are ready. Now, you need to sand and polish the edges with fine-grain sandpaper, then drill holes at the top of the pieces and attach them to the hooks.
Types of Epoxy Resin Glue
- Two-component epoxy resin + hardener
- Liquid for paperweights
- Two-component silicone and hardener
- UV resin 30 ml
- Universal two-component adhesive - resin and hardener
- Two-component epoxy resin 75 ml
- Lorca epoxy resin
Price Range
EM ART offers budget-friendly prices and a variety of hobby and craft products. Enjoy regular promotions, discounts and if you buy in bulk, you can get up to 70% off.
Why Choose EM ART?
With our fast search engine and filters, finding the materials you need is easy. Our online consultants are ready to answer any questions.
Order and Delivery
Place your order 24/7 online, and we’ll deliver it to your preferred address.

